I wanted to share with you all, a class I recently took... Now, I believe I've said many times over that I am self taught at cake decorating... but, I will be the first to say that I still have so much to learn. The fact that I have not taken any cake decorating classes yet is not so much that I don't WANT to take classes, it's that the instructors I am interested in learning from never seem to make it up my way. I'm not sure that I would get much out of a Wilton class at my local craft store.. and even my semi-local cake supply store only offers the most basic classes. But, I would love to learn from some of the masters!
Enter... Craftsy! They offer online crafting courses (okay, I think that was at least partially implied by the name, haha!). At this point they only have one cake decorating/gumpaste flower class, but hopefully it will be popular enough that they will produce more in the near future. The class that they offer (and that I recently enrolled in and completed), is called Handcrafted Sugar Flowers and it is instructed by Jacqueline Butler!
Jacqueline, if you don't already know... is internationally known for her stunning sugar flower arrangements. She often travels to teach her techniques, but unfortunately has only once, that I know of, made it to my area... and I didn't find out about it until a week later!! She writes The Petalsweet Blog. Head on over to check out her amazing work, she is one of my favorite sugar artists!
Last month, I received, in my inbox, an ad with a discount offer for the Handcrafted Sugar Flowers class (regular price is still a great deal at $59.99), so I said why not? It's a great deal and I've been looking to take some sort of formal instruction for a while now. This class teaches Hydrangea Petals, Buds and Leaves as well as some Filler Flowers, Buds and Leaves. While they may seem simple, sometimes it's the simple things that are the most difficult to learn/do. For instance, I bought the new Wilton cutter set a while ago... and while I know they cutters aren't the greatest, I was hoping to at least make some half-way decent hydrangea! I couldn't figure out how to get the tiny little center to stay attached, it got so slippery with glue! Well, I don't want to infringe on Jacqueline or Craftsy by mentioning about her techniques... but she teaches some basic skills that will be useful when making sugar flowers, things I never would have thought about myself!
This class definitely gets my stamp of approval! If you are, like me, mostly self taught, I recommend trying this class! It's interactive, so you can ask Jacqueline questions and she can respond. It's very informative and will have you mastering these basic flowers in no time! OK, so I know that I have not yet mastered them... but my technique has already improved and I'm confident that with a little more practice, I will master them in no time!
I hope that my flowers do this class justice! I have not yet received my order for the cutters and veiners... so I had to make due with the Wilton ones I had! If you want to try this with the Wilton Hydrangea cutter... I suggest cutting the petals a little to give them more separation and a little more realistic look!
Way back (about a year and a half ago...) when I first decided to try my hand at decorating cakes, one of my cousin's asked me to make an R2D2 Cake for her son's birthday party... The picture below is my first attempt at the lovable little droid :)
Everyone at that birthday party was impressed with this attempt... but all I could see were the glaring flaws. Now, this was maybe the 2nd or 3rd cake that I had ever decorated, so looking back it's not so bad for a first attempt. But I was never quite proud to display it on my website.
Well, to my extreme pleasure, I've had a second request for this cake and jumped at the chance to redeem myself (if only in my own mind, lol!). I am much happier with the result of this latest attempt!
Hooray for improvement! This just goes to show how far you can come with practice. Some of the improvements I made (beyond the generally neater work):
I cut out the panels from fondant, instead of feebly trying to outline them with royal icing. Piping a straight line on the vertical side of a cake is NOT one of my strong suits, haha! Plus, I think the cut outs give it a more "realistic" look.
I also, have learned how to properly smooth icing on a round shape, so R2D2 did not come out so "cone-headed" this time!
Another thing that I've learned (the "hard" way) is to properly measure for good spacing and placement. Instead of just winging it. It's hard to fight the urge to jump right in with decorating, but doing the preliminary work of measuring makes the job so much easier, and it just looks better!
Use a ruler! Not only to do your measuring, but to cut straight lines, lol! I know this should be a "duh" kind of thing... but as you can clearly see on the first cake, I thought I could eyeball it... well, I cannot! So I always have my trusty straight edge nearby :)
And one final thing, that has made all the difference in the world in my cake decorating... always have Tylose Powder in my decorating kit. When I am working on fondant embellishments, I always knead a little in... it helps stiffen up the fondant so it isn't so stretchy. so when you are lifting a fondant ribbon, square or any shape you have cut out... it doesn't loose it's shape and sharpness...
The problem with being self-taught, is there is no one to tell you these things that are now completely obvious to me! Little things like using a ruler to measure and cut straight lines... well duh, how else are you going to keep your work clean and neat?! So, if you take anything away from this post (besides maybe inspiration for your own R2D2 Cake)... let it be to slow down and take a few minutes to lay out your design and remember the simple stuff!
I was so excited, when a few weeks ago I was invited by 5th Avenue Weddings & Events to participate as the cake decorator at an intimate bridal show hosted in conjunction with Simply K Studios. This was my first ever bridal show so this setting was perfect! I cannot wait to see the beautiful photo's that Simply K Studios took of the beautiful displays that 5th Avenue Weddings created! I designed a cake (and tasting samples) that were featured on a gorgeous dessert table!
I promise to share the pictures from the event as soon as I have them, but for now here is the cake I designed for the show!
Meena (the creative mind behind 5th Avenue Weddings & Events) suggested ruffles because they are very "in" right now. So ruffles ended up being the basis behind my design for this cake. I love how the layers of fondant ruffles look like delicate fabric and give the cake a feminine and vintage-y look!
I didn't want to overwhelm my little cake with too many ruffles, so the middle layer is simply adorned with fondant, fabric-looking flowers, gumpaste "jewelry," sugar pearls and dragees...
That is not a real jewelry piece! This is a gumpaste sugar broach I made! I added sugar pearls and silver dragees for a little extra shine and sparkle. The broach itself is dusted with edible "Platinum Dust" to give it a soft metallic look. People could not believe it wasn't real :)
I had such a great time, met some beautiful brides and some really wonderful industry professionals. What an honor it was to be included. If you are in the CT/New England area check out:
5th Avenue Weddings & Events for your wedding planning needs. Meena is amazingly talented and hands on... she will help you create your vision! Simply K Studios Photography, these talented ladies take really, really beautiful and creative photographs! They will perfectly capture all of the special moments of your wedding day. Larissa Lake Make Up Artist & Co if you want to look a little extra stunning on your wedding day! This team of artists specialize in photography make up, so your pictures will look flawless. They also offer a full suite of pamper-you services for your wedding day!
Alright, I've been posting over the past couple of days about the "mystery cake" I entered in the CT Cake Competition last weekend... time to unveil my creation! I'm sure you will all be very underwhelmed, lol!
Now, I had very grand plans for this cake... but I simply did not have the time to pull it together due to other obligations last week... But I did win a 3rd place ribbon... so here it is (insert drum roll, please...)
So this is my little cake, sitting between two, much larger, tiered cakes at the competition with my pretty yellow ribbon :) Let me just say that I really don't like the way I placed the flowers (Lily of the Valley) around the middle tier! Besides just looking ridiculous, I am embarrassed that the judges though I would have put flower wires directly into the cake! I would NEVER do that, just FYI... if the wires were to be placed into the cake, I would insert straws first, so the wires would not touch cake... OMG, I was so embarrassed! This was a "dummy" cake, so I didn't think I needed to insert straws into the stryofoam... also... I was exhausted from lack of sleep, tired from a stressful drive to my mother's house in Connecticut and just ready to be done with the cake! So I literally just stuck them in and went to bed, haha!
Okay, I'm not trying to make excuses for my work... I am happy to have gotten a 3rd place ribbon... but I wanted to let everyone know why I changed the flower placement for the pictures I took! I want to be able to add this cake to my portfolio and the way it was I just did not want photographic evidence of it, haha! So here are some additional pictures of my cake, looking a little better!
The fondant was kind of a light lavender...
The band on the middle tier was embossed with one of those cross-stitch plastic form things!
I used brush embroidery to give a "fern" motif to the tiers
And going for a "New England wild-flower" theme, I added some stems of Lily of the Valley (they may look simple, but you have to make a lot of them!)
Overall, this cake is just not what I had intended and I think my point just did not come across... But in the end I think I have a "pretty" cake, that after making a few adjustments, I can add to my cake portfolio!
I know one thing, after seeing the amazing cakes at the show (you can see my post from yesterday if you want to see some of the pictures I got), I am excited and inspired for next years competition!
So, as I mentioned in my post yesterday about Icing Smiles, last weekend was also the weekend of the Connecticut Cake Competition! I had been looking forward to it, after having entered for the first time last year, and winning a blue ribbon AND the division trophy for my Magnolia Baby Shower Cake.
(my winning entry from last years competition)
Well, because I was so busy with the Icing Smiles cake, I was not able to dedicate as much time as I would have hoped to execute my entry as I had planned. I'm going to make a few changes to it, and I will have my pictures up soon! (you can see pictures of my entry here!) But for now, I wanted to share a few pictures of some of the amazing cakes that were there! I thought I had gotten more, but I was probably too busy picking my jaw up off the floor to remember to snap the shot, lol!
This year's theme was "The Great Outdoors" and while not every entry really stuck to the theme (mine certainly got derailed, haha) take a gander of some of the works of art that were there this weekend!!
This Owl Cake was immediately one of my favorites!
Those are CAKE! They are so cute, I just want to take them home, so they can live in my house!!
Those scuplted eagles were SO life like!!
And this was the back of that amazing Eagle Cake!
Those are NOT real turtles! This is just amazing...
I think this one is SO pretty with the gold, ruffles and hearts!
Such beautiful colors and patters, and I live the elephants on top!
This Winter Wonderland Wedding cake was jaw dropping... This picture does NOT do it justice, but I couldn't get another because everyone wanted a closer look!
I love this cake! The lace detail was so amazing, I think this was a "blue ribbon cake" (I later saw this cake posted on Cake Central, it was created by user goa11ie)
This was a YOUTH entry! Who ever made this has an extraordinary career as a cake designer ahead of them
There were SO many fantastic cakes at this years competition. This is just a small sampling of the amazing talent that was in that room. I really wish that I had gotten more pictures! I don't know about you, but I am totally inspired for next year!
*I won a 3rd place ribbon for my cake (which I will post pictures of as soon as I've made a few minor adjustments)... Given the fact that I had NO time to work on it, and seeing all of these amazing cakes, I am honored and flattered to have gotten that!
If you live in the Connecticut area and are interested in entering a piece for next years competition (they have entries for ALL levels!), the competitions are generally held in February in Hartford, CT. Keep an eye on their website or Facebook page. They usually announce the theme for the next show in the fall!
I posted a few months ago about Icing Smiles, a charity that provides cakes for critically/terminally ill children and their siblings. As soon as I got my business started and all of my licensing was in place I volunteered as a baker to this wonderful charity! I was so excited a few weeks ago to have received my "Call to Action" and last week I was working on a very special cake!
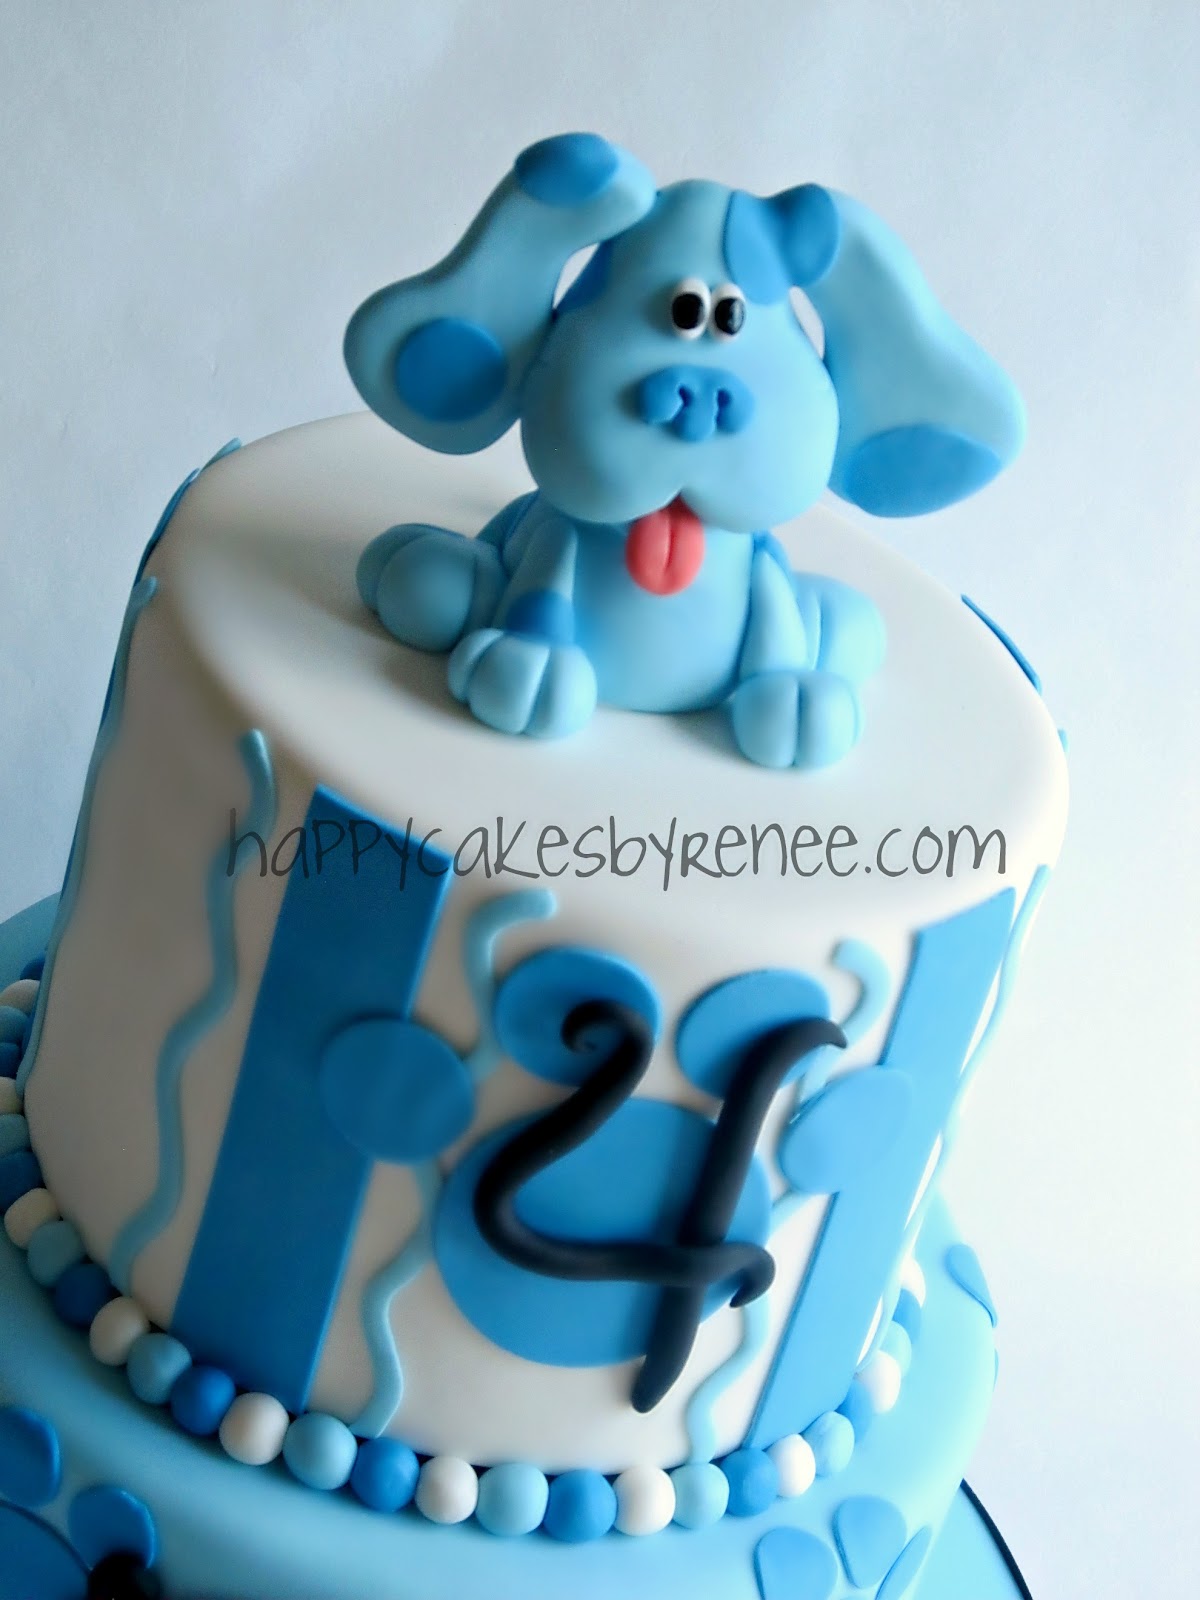
They have 2 different "levels" of cakes they offer. The "Fun" cake or a "Dream" cake! I created a "Fun" cake for a little boy who loves Blues Clues!
While I knew right away that I wanted to volunteer with Icing Smiles, I did not know how amazing it would feel to be able to make this cake! I am lucky enough to have two healthy kids, and they can have fancy cakes whenever they want (well, within reason, lol)... So, while I LOVE to decorate and bake, we often see cakes as "just cake," a regular occurrence in our house... But that isn't the case for the "Medical Families" that Icing Smiles serves. To them these cakes MATTER! They are so caught up in tending to the needs of their sick children, things like birthday parties and cake, sometimes, have to be over looked. Knowing what goes in to these cakes I know they are expensive, and with mounting medical bills "Medical Families" sometimes can't afford the expense of a birthday cake, let alone a custom art cake...
But Icing Smiles, who delivered their first cake in January of 2010, works with their volunteers to bring a little brightness to these special and deserving children. I am so happy to be one of their volunteers and to have made this cake for Alex, for whom this was the first year he had a birthday party because his brother has been sick.
I had agreed to take on this cake, for the same weekend of the CT Cake Competition (I'll post on that later!). So last week I was really busy and stressed trying to get both cakes done. My Icing Smiles cake, rightfully, took precedence and I wasn't able to spend as much time on my competition cake. But there is NO WAY I would have turned down making the cake for Icing Smiles! It was my honor to be chosen as the baker for this family... and the "Thank You" letter I got from the family brought tears to my eyes... it made me realize just how lucky I am, and how an act of kindness can mean so much to someone else. It made me realize that any amount of stress I "suffered" was nothing compared to what these families live with on a daily basis. And my "stress" suddenly didn't matter... I hope I have the opportunity to do this again!
Icing Smiles' motto is "Baking a Difference" and that is exactly what they do/provide for these families! They rely on the kindness of others to be able to serve these children. There are many ways to support Icing Smiles, and you don't have to be a professional baker to do so. They accept donations as well as rely on volunteers for fundraising, deliveries, professional bakers, nonprofessional bakers, and even just getting the word out. So, if you are so inclined, check out their website to see how you can get involved and support Icing Smiles. "Like" them on Facebook and help get the word out!!
Hey everyone! So, this probably should have been one of my first posts... back with my "Getting Started" series of posts. But, hey, better late than never!
One of the first things you probably want to do once you have graduated from the basics of baking and cake decorating is to make a tiered cake! But, if you're new to cake decorating... it may not be entirely obvious that you can't just plop one cake on top of another (well without disastrous results!). Mosey on over to Cake Wrecks (on any day but Sunday) and you are sure to see what happens when a cake is not properly supported!
Methods for Stacking and Support
you can skip to the bottom of this post to see a
video demonstration of the system I use
1. Dowels/Straws
There are many different ways to stack and support your cakes. The cheapest, most readily available and one of the most common methods is the dowel method. I used this method when I first started, before I knew there were other ways... It DOES work, when done properly, but transportation always seemed a bit perilous!
All you do it insert wooden dowels (Wilton sells them), into your cake, mark and cut them to the height of your cake, and then place the upper tier (that is on a cake board) on top of the dowels. Don't get me wrong, this technique is widely used in cake decorating, and used successfully... However, you can run in to a few problems... and when people speak of cake disasters, very often this is the support system they used.
First of all... an integral piece of the support puzzle is to make sure your cakes are level... it's not just aesthetics, if your cake isn't level, it is extremely likely to slide, lean or collapse (unless you are intentionally making an unlevel cake- ie Topsy Turvy, in which case you'll need a bit more careful structuring...). When cutting your dowels, it is very easy to cut them just a bit off, resulting in an uneven, unlevel and unstable cake. Next, what if you don't insert the dowels exactly perpendicular? You're dowels can go in skewed or even slip under the weight of the cake it's supporting... You end up with an uneven and unstable cake... What if your cake boards get soft from the butter or oil or whatever moistness is in your cake or buttercream? The dowels don't have a rigid surface to support and/or rest on!
Now, yes, these are the extreme case "disaster" scenarios... but they DO happen. Cake Central has a dedicated "Cake Disaster" forum, filled with stories of cake collapse... and many (granted, not all) start with "I used dowels." Now, if this is what you have, go for it! Just be careful to cut your dowels evenly, and take care to make sure your cakes are level. A slight variation to this method, that many swear by, is to use Bubble Tea straws (you can buy them online or at Asian markets). I have not used the straws, so I can't comment about how sturdy they are, but I think a lot of the problems that could arise from the dowels would apply here as well.
2. Metal Cake Plate/Rod System
If you are looking for a more secure and reliable method for stacking and supporting your cakes you will probably run across metal systems, such as Cake Stackers, in your research. Now, I have not used this system, but I have been "Wowed" by the video of a woman holding a 5 tier stacked cake completely horizontally! In my opinion, this system looks great! However, it is an investment... the pieces are intended to be used over and over... so they can cost a pretty penny. Then, you have to "rent" out your set when someone orders a cake (and if you're busy with cakes then you'll need a few sets) and worry about getting everything back, undamaged and in a timely manner. And, if you are just a hobby baker this system might be cost prohibitive. For the Cake Stackers, smallest tiered set (10-8-6 rounds) you're looking at about $100 (on sale!). If you are inclined to invest in this system, I say go for it! If cost wasn't an issue an issue I would!
3. SPS (Single Plate Separators) System by Bakery Crafts
SPS is the system I use... SPS is a system of plastic plates and pillars/columns. I like it for many reasons. It is extremely sturdy. The columns lock into "feet" on the bottom of the plastic plates, they aren't going to shift under the weight of the cake above. The columns are thick plastic and won't splinter or crack! The plates have a little plastic peg on them, you poke it into the cake board of the tier resting on it and in combination with royal icing "glue" the tier isn't going to shift around! The pieces are cheap enough, that you can consider this a disposable system. No hassle trying to get your pieces back, worrying about deposits, rental fees, and the possibility that your investment has been damaged or lost. However, the plates and pillars are sturdy and durable, if you wish to re-use them you certainly can!
Here is the video demonstration I put together of how to stack a cake with the SPS system. I was just stacking a small 2-tier cake in the video, but I've used it on a large 4 tier cake, with no worries!
(I apologize for the lack of narration! My audio got messed up and the microphone on my new computer is terrible! I had to explain the steps with captions)
The SPS pieces come in a variety of colors and size (and shapes for the plates). I just use the White Round plates and the 4" White Grecian Columns. I prefer to build my cakes to exactly 4" tall and not have to worry about having to cut the thick plastic. However, the columns come in 9" lengths that are scored for easier cutting... or you can get extenders if you need to add a few inches to the 4" pillars.
You can find SPS almost any online cake supply store... as well as some of your local cake supply shops. My local shop does not carry SPS, so I order from Global Sugar Art online.